10+ parts and task management list tips to help with your project
Posted on Jan 25, 2022 in Featured | 2 comments
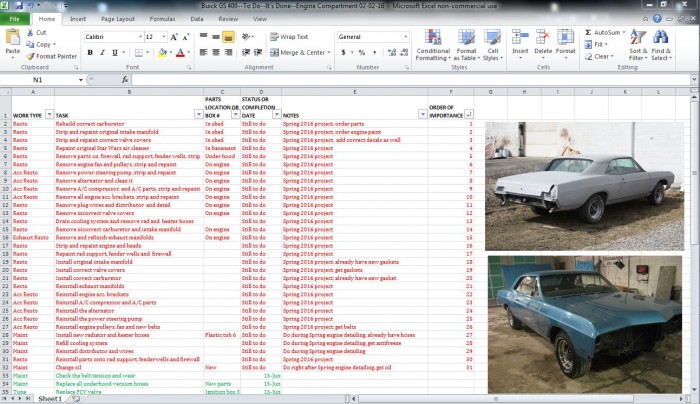
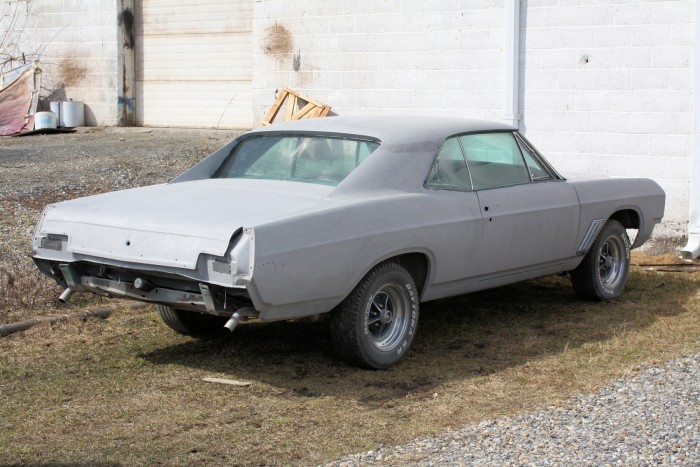
Here is an example of my Microsoft Excel engine compartment worksheet for my Buick shown on the desktop along with a couple of in-process car restoration photos just to make it more interesting to look at for the blog. My columns are broken down by “Work Type,” “Task,” “Parts Location” at my house and/or box number, “Status or Completion Date,” “Notes” and “Order of Importance.” The last one allows me to prioritize future tasks simply by numbering and sorting them. Since the finished tasks don’t require prioritization anymore, I remove their numbers when I complete them. This worksheet layout works well for me. You can experiment to see what works best for you.
Having an “It’s Done” list can be just as beneficial as that “To Do” list we all stress over. One of the most important things we can do, but sometimes don’t, is gauge the progress of our projects in writing. I don’t mean keeping a journal as such, though you certainly can, I’m talking about making lists. Keeping running lists of parts you have and parts you need, parts to restore and parts you have restored, tasks to complete and those that you have completed, and the dates that all of it happened are an integral part of the process that can help keep you motivated during times of low energy. Like the middle of winter when it’s cold and damp outside.
Going back over these lists, focusing on what you have accomplished, may help to recharge your batteries before concentrating on what lies ahead. Maintaining them will also provide documentation of your project over the time it took you to do it, which can complement the hundreds of photos you took for the same reason (and for reference, of course).

You can try to fit everything into one list, but it will probably be too large to remain easily readable and workable. Separate lists for “Parts Have/Parts Needed,” “Parts to Reinstall,” and “To Do—It’s Done” or any combination of these or anything else that you deem significant, may be easier to work with.
Here are few simple tips:
A Word file can suffice, or you can use a spreadsheet program. The latter will likely allow for quicker rearranging and sorting of rows and columns of items.
Name each list (or Worksheet) file, and type in the date at the end of it as part of its name. Change that date each time you update the info in it, so you instantly know the last time that you worked on it. (I know the computer can tell you that, as well, but I just like it better this way.)
Date each item in the lists to show when it’s completed.
Color-code your “Parts Have/Needed” lists for quick and easy reference. For example, if the part name is red, you don’t have it yet. If it’s green, you do.
Add other colors or notes for such things like whether or not you’ve located the part or comparative pricing if it’s available from multiple sources, etc.
You can also add part numbers and/or casting numbers for items you are seeking to more easily organize your search.
You can add part descriptions, as well. For example, note typical trouble spots of a used part, or how the original, NOS and reproductions compare, etc.
This same color coding also works well for your list of “Parts to Reinstall.” If it’s red it’s not ready for installation yet, if it’s green it is. You can also note or color code where it is in the restoration process, such as “still dirty,” “disassembled,” “cleaned,” “repaired,” “reassembled” and “painted.”
You can even add simple installation notes like the best order for this part and other parts around it to be installed to facilitate the process. Or even what hardware is required.
Color coding items in your “To Do—It’s Done” list the same way—red for still to do and green for completed—is just as helpful as it is for the other lists.
You may also decide to color code or sort from the easiest to most difficult or time consuming tasks to help you better budget your time in the garage. Knock out the easier tasks when you’re pressed for time and save the more difficult ones for when you aren’t. It’s also a great way to get you working when you don’t really feel like it. If you know you can complete a few easy tasks in just 15 minutes or so, why not get in there and do them, so they can be marked as completed?
Categorizing these lists (or even making separate lists) by the area of the car, such as body, chassis, engine compartment, drivetrain, interior etc., can also be helpful to keep items and tasks organized and gauge progress.
Even if your car is at a restoration shop, you can chart its progress with lists similar to these but modified to fit your situation. For instance, if the shop is doing part or most of the restoration, but you are completing it at home, you can keep track of which parts you delivered to the shop and which ones you kept at home for you to restore and reinstall. They can also help with your task management to ensure that you are prepared to get to work when the partially finished car comes home from the shop.
Since the lists are in a computer program, you can easily print out any one you need or even sections of it to use as a checklist while working in the garage. And if it accidentally gets greasy, dirty, wet or lost, you can easily print another one.


For those of us not admirers of technology and the way it is destroying us, I simply use pencil and paper (remember?) and keep the list pinned to a cork board on the wall in the garage next to the light switch. When I complete the task I mark it off. Come on, everybody.
You are an analog man in a digital world Maestro. Me too.